No .env File When Uploading to Aws
Laravel API file upload to AWS
How to prepare an amazon saucepan and upload files from a Laravel API application

Amazon S3 ( Simple Storage Service) is a cloud storage facility that allows for the upload, storage and retrieval of data, including static websites, images and documents. You can read more about S3 benefits on Amazon's official documentation.
Laravel provides drivers to hands connect and upload your data to Amazon S3, and we are going to see how. The source code is available hither. This article is divided in three sections:
- Project setup, where we create the Document Model and the related migration, controller and API resource
- File upload, where we add a script to upload files to S3
- Amazon bucket setup
- Env and config file setup
We are going to use Postman to test the API routes.
Disclaimer: the focus of this commodity is the file upload, retrieval and deletion from Amazon S3. API hallmark is outside the scope of this article. If demand be, read more than on Passport hallmark, merely ideally, one should authenticate users making requests to/via the API.
Project Setup
Allow'south create a new Laravel project
composer create-projection --prefer-dist laravel/laravel laravel-aws-demo Move into the project and create the Document model and the related migration.
cd laravel-aws-demo && php artisan make:model Models/Document -m Let's modify the documents migration.
          Schema::create('documents', part (Blueprint $tabular array) {
            $table->id();
            $table->string('name');
            $tabular array->string('path');
            $table->timestamps();
});
You can use UUID instead of motorcar-increment IDs for your chief cardinal on your models. I have covered using UUID in Laravel in this article.
In order to connect to the s3 saucepan inside a Laravel app, you need to install this required package:
composer require league/flysystem-aws-s3-v3 ~i.0 Lastly, update your .env file with your database credentials. And so run php artisan migrate.
File Upload
Let's create the file upload controller. For this demo, we are only going to focus on the store and destroy methods.
php artisan make:controller DocumentsController --api When the store() method runs, a folder 'user_documents' volition be created inside the s3 bucket (that nosotros will specify in the .env file), and the folder volition comprise the file we uploaded. The file name will be hashed. In case y'all want to specify the proper noun of the file, y'all can use the storeAs() method. Since we are non using the default storage path, we demand to specify the disk that will be used, in this example s3. Same applies to the destroy method, we demand to specify the s3 disk.
Now let's create a Document resource to format the response sent to the user php artisan make:resource DocumentResource
          <?php          namespace App\Http\Resources;          use Illuminate\Http\Resources\Json\JsonResource;
use Storage;          class DocumentResource extends JsonResource
{
            /**
            * Transform the resource into an array.
            *
            * @param  \Illuminate\Http\Request  $asking
            * @return array
            */
            public function toArray($request)
            {
            return [
            "id" => $this->id,
            "proper noun" => $this->proper noun,
            "path" => !empty($this->path) ? Storage::disk('s3')->url($this->path) : '',
            ];
            }
}
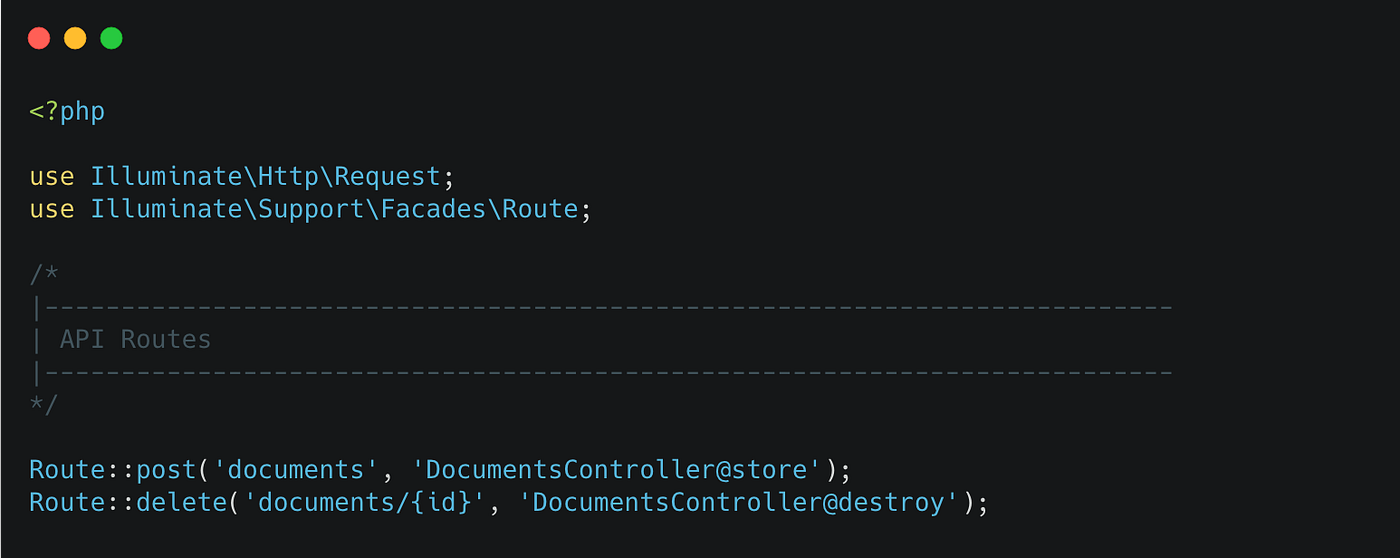
Let'south update the routes/api.php file.
Amazon account setup
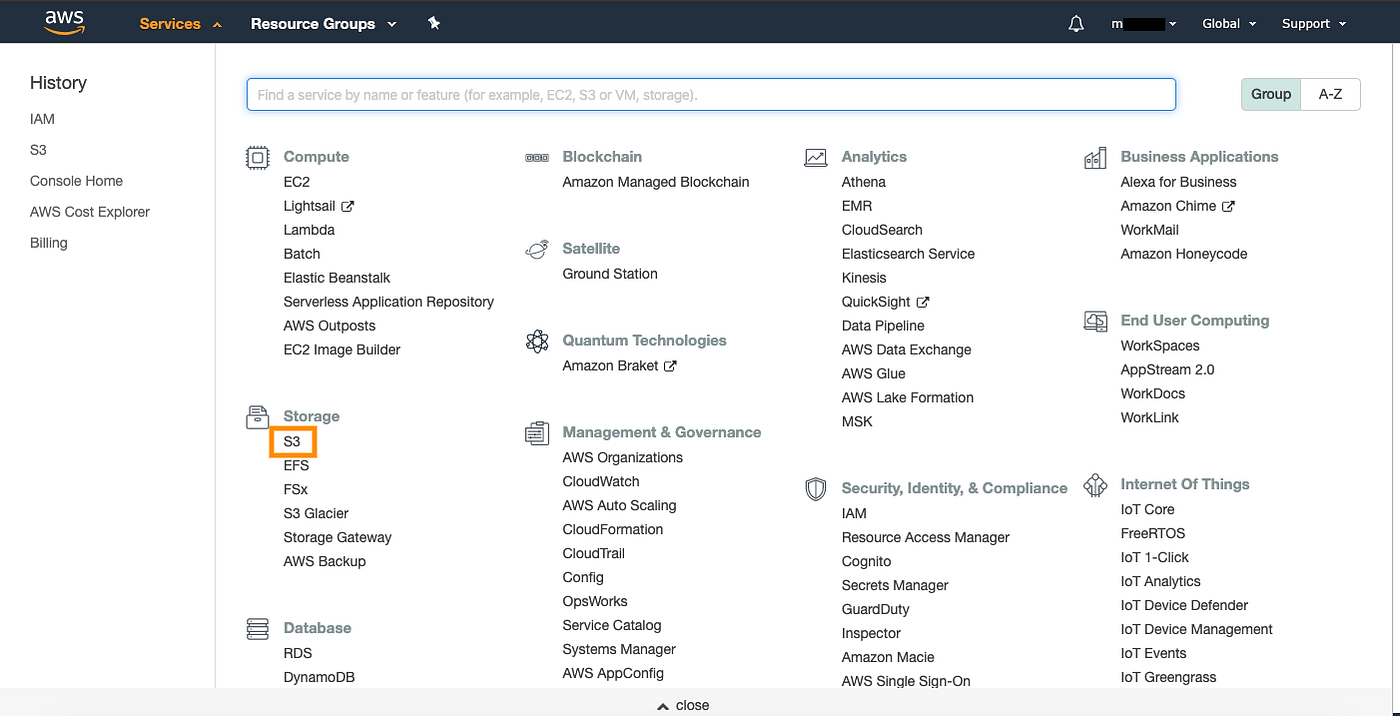
Head over to Amazon Spider web Services and create an business relationship. You will need to enter your billing details for your business relationship to be active. Whatever service listed under their Free Tier is free for 1 year as long every bit you remain within their usage limit. One time your account is verified and active, on the top carte, click on Services, and select S3.
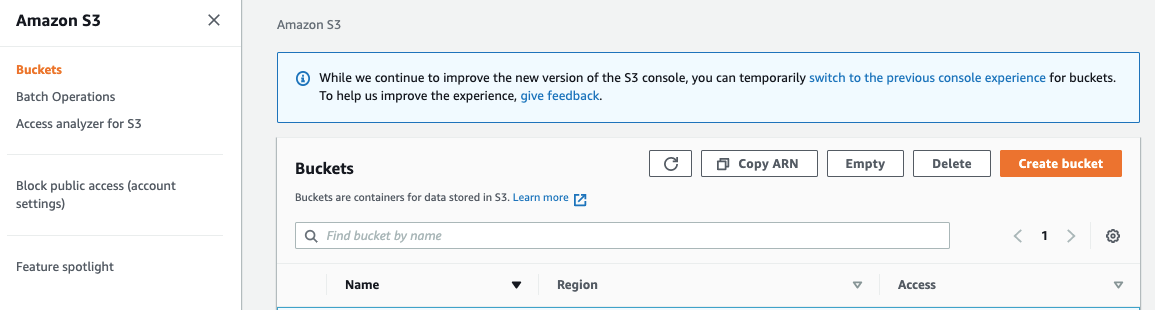
Click on the Create Saucepan button. On the new page, enter a unique saucepan proper noun and select the region:

If your region does not appear by default, you lot can enable information technology for your business relationship.
Based on my configuration, in my Laravel
.envfile, my region configuration will beAWS_DEFAULT_REGION=af-s-1. We volition be updating the.envfile after.
The adjacent section allows you lot to ready up the visibility of the bucket. It is set to cake all access by default. You need to untick to let read and write access.
Alert ! Grant or deny access to your saucepan based on your requirements. Read more near buckets security hither )

Update the following sections as per your requirements


You can update these settings later. Click on Create bucket.
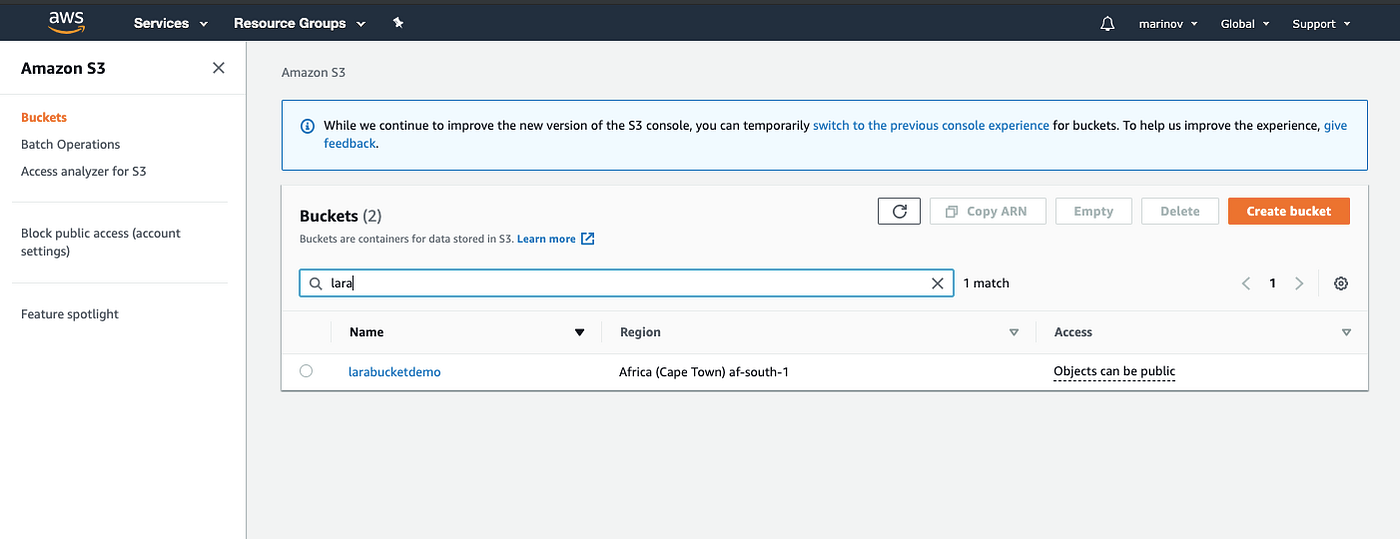
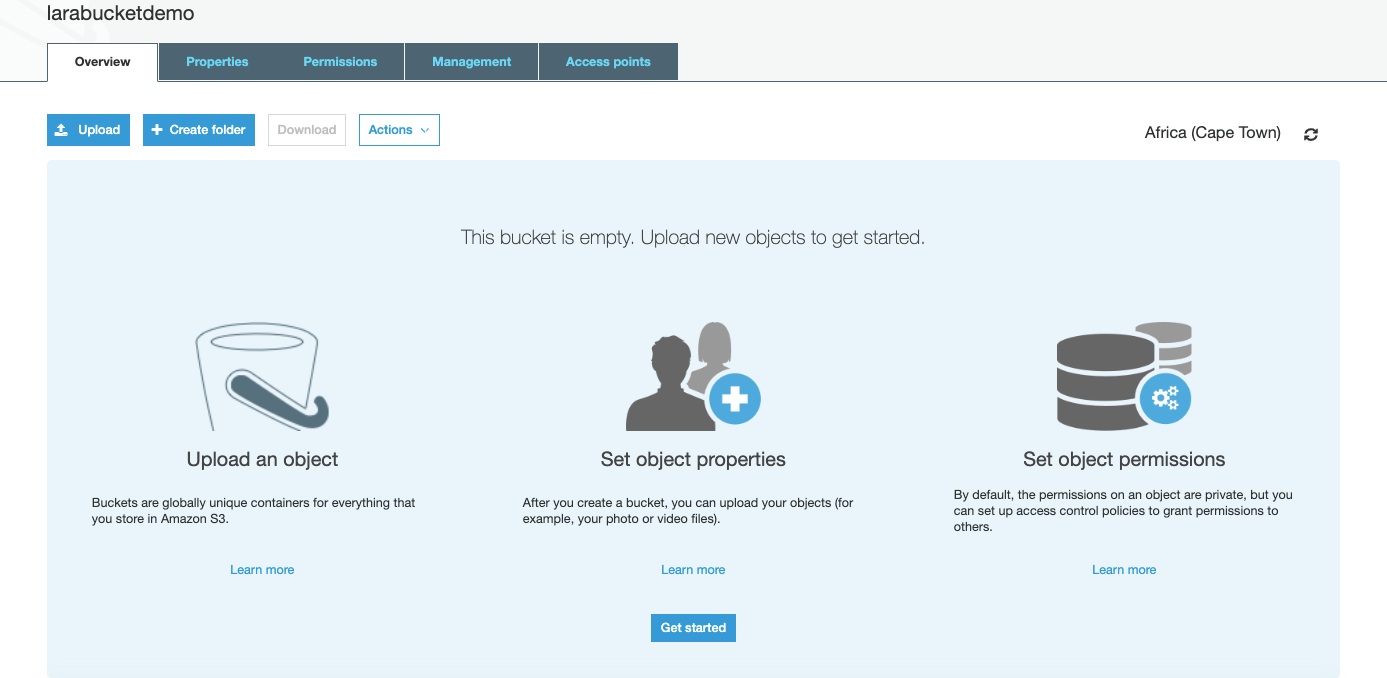
This is what your bucket looks like:
Now that the bucket is created, we demand to gear up access keys that our API will employ to connect to our bucket. On the superlative menu, nether your account proper name, select Security Credentials.

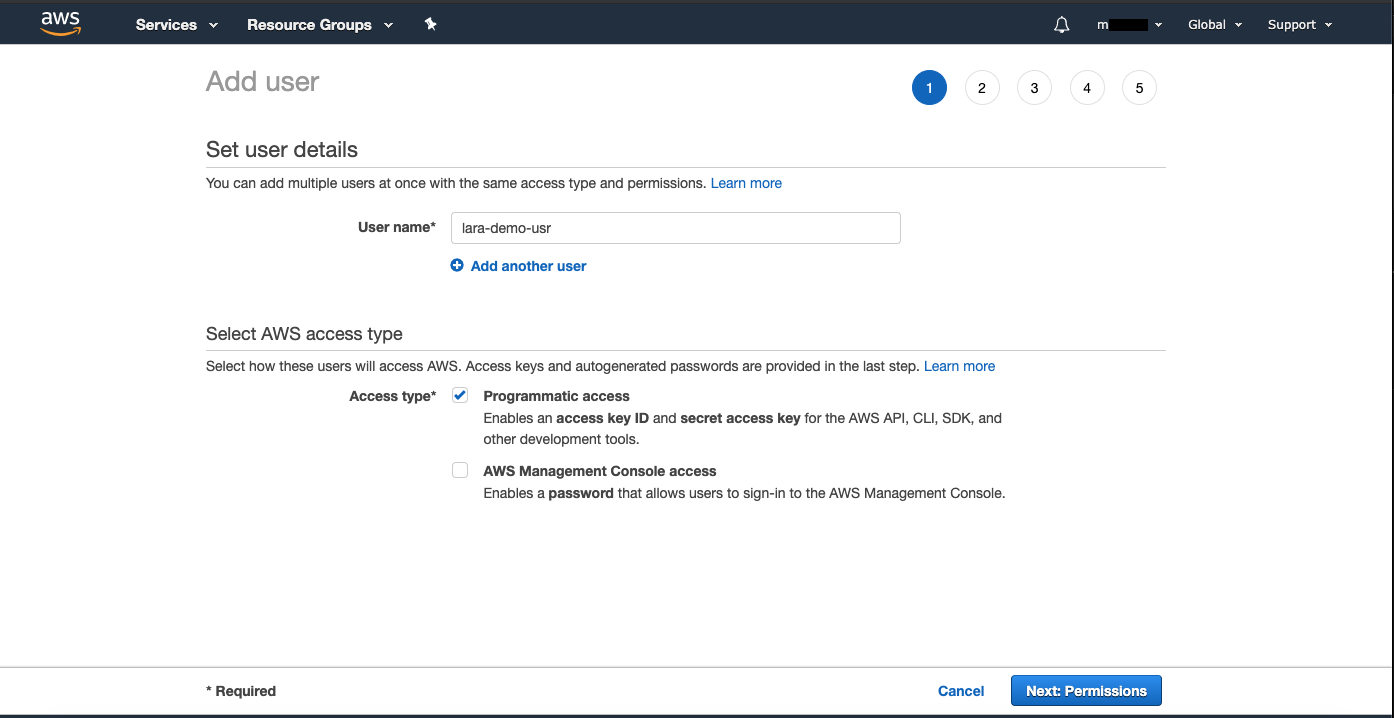
Click on Users on the left sidebar, and then click on the Add User button:

Let'south dive in. Footstep 1: Create a new user
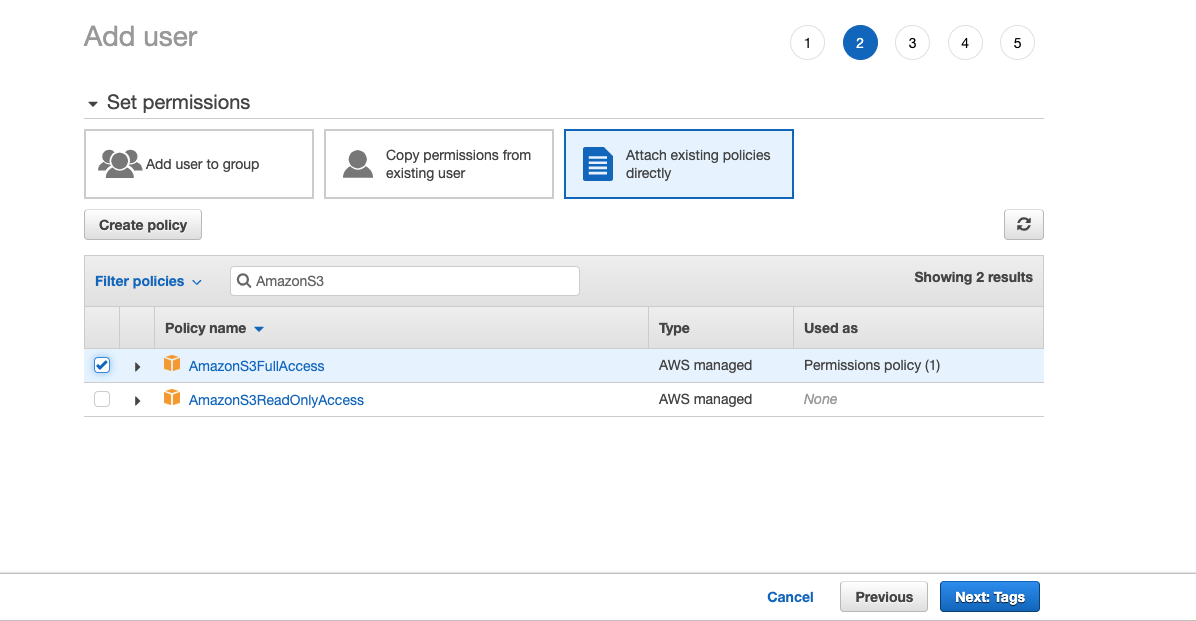
Step two: Click on Attach existing policies directly. Search for AmazonS3 in the filter, and select AmazonS3FullAccess to be able to have read and write access to the saucepan.
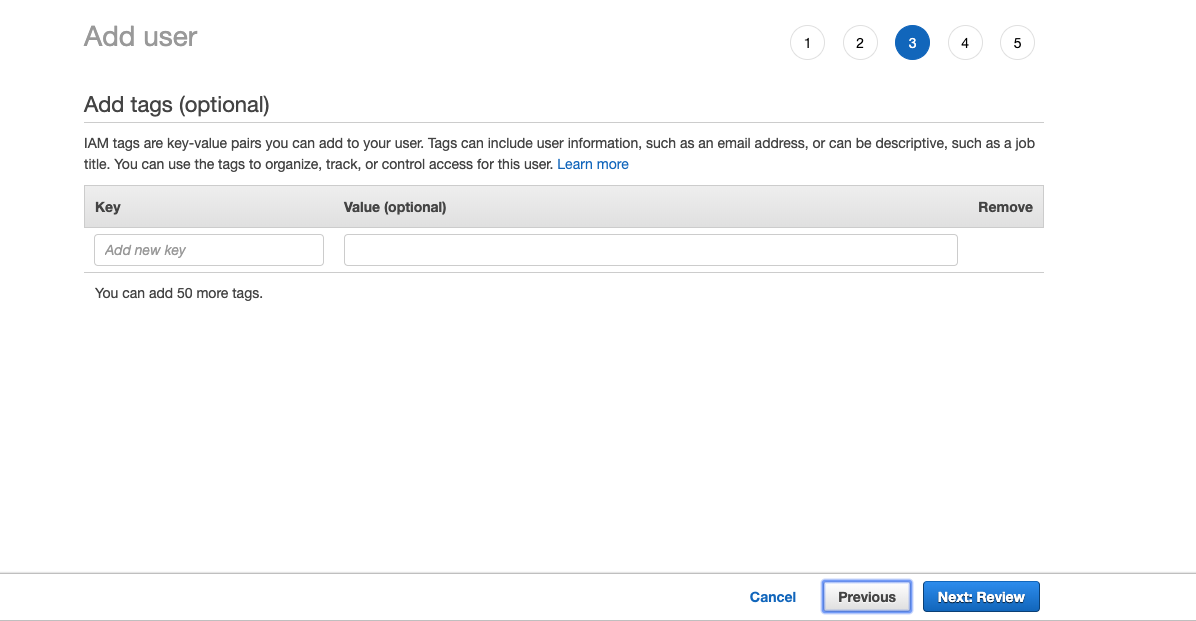
Pace 3: Add tags (optional)
Stride 4: Review your input
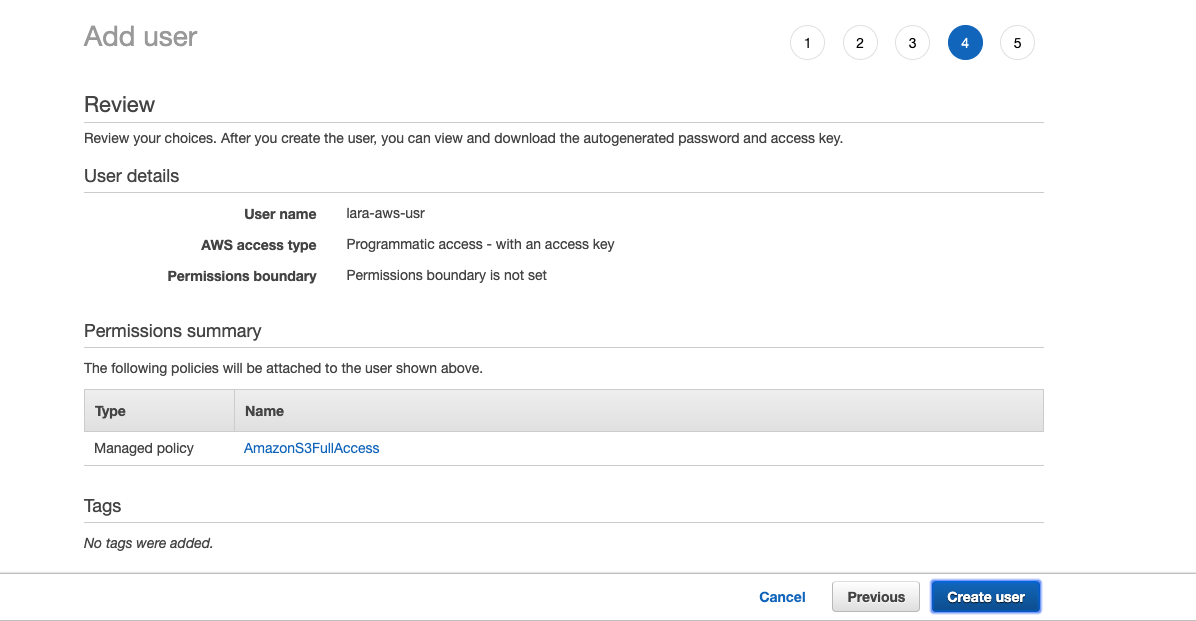
Step 5: Your user is created. Copy the Access key ID and the secret access fundamental. These values will become to your .env file.

Env and config files setup
          AWS_ACCESS_KEY_ID=PUT_THE_ACCESS_KEY_ID
AWS_SECRET_ACCESS_KEY=PUT_THE_SECRET_ACCESS_KEY
AWS_DEFAULT_REGION=PUT_THE_SELECTED_REGION_CODE
AWS_BUCKET=PUT_YOUR_BUCKET_NAME
Gear up upwardly file visibility
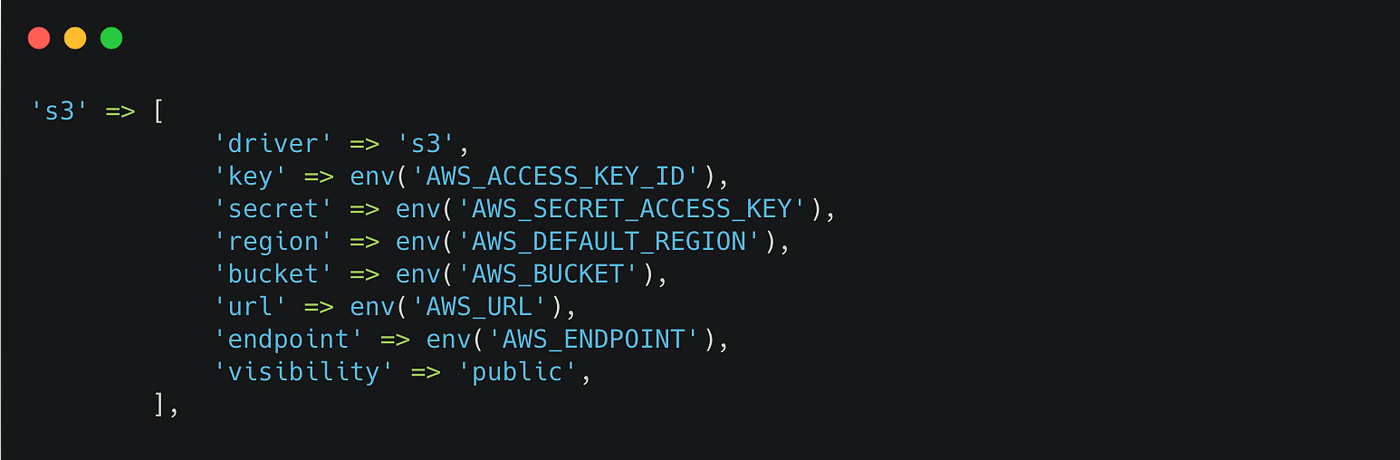
Open the config/filesystems.php file, that contains the filesystem configuration of our Laravel app. Gyre down to the Filesystem disks section. Past default, Laravel includes the configuration for the local, public and s3 disks. You are free to add boosted disks or update the existing ones. To be able to access/view the files after they have been uploaded to Amazon S3, yous can change the visibility of the S3 disk to public.
'visibility' => 'public', Your s3 settings will expect similar this:
If yous do not want all the files uploaded to the S3 bucket to be attainable past default, instead of adding/updating the visibility setting of your s3 deejay to public, y'all can do it on a per file basis. For instance, when storing the file, yous will need to fix the visibility to public as below:
$documentPath = $request->file('document')->store($base_location, ['disk' => 's3', 'visibility' => 'public']); Testing
Let'due south head over to Postman. Create a new Postal service asking. Select Body > class-information.
Enter the key names every bit on the screenshot. By default, the property type is set to text. You lot need to select File from the dropdown.

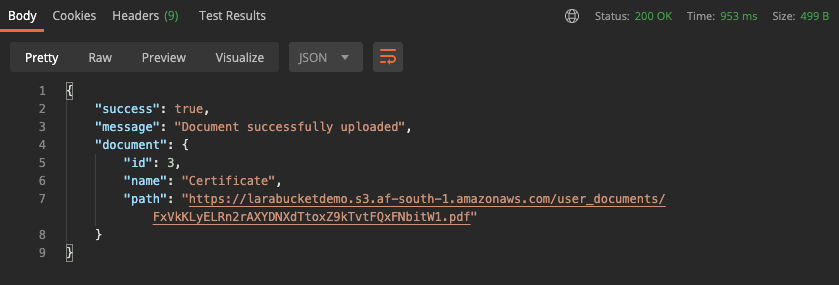
Once you upload the file and click on Ship, y'all should run across a similar outcome.
The database will expect like:

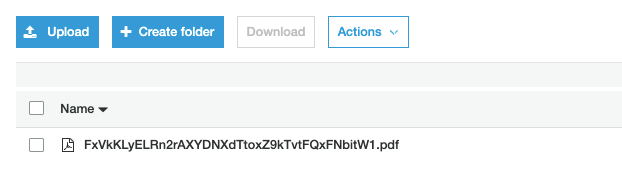
The bucket will show a new folder called user_documents, and inside you volition find the file we uploaded:

Possible errors you might run into
1- Adapter non found
Class 'League\Flysystem\AwsS3v3\AwsS3Adapter' not found Delight brand sure you run the composer command to install the adapter: composer require league/flysystem-aws-s3-v3 ~1.0
ii- Error retrieving credentials
Error retrieving credentials from the example contour metadata service. (ringlet error 7: Failed to connect to xxx.xxx.thirty.xxx port 80: Operation timed out (see https://coil.haxx.se/libcurl/c/libcurl-errors.html)) Double-cheque your AWS credentials in the .env file
3- Access denied mistake
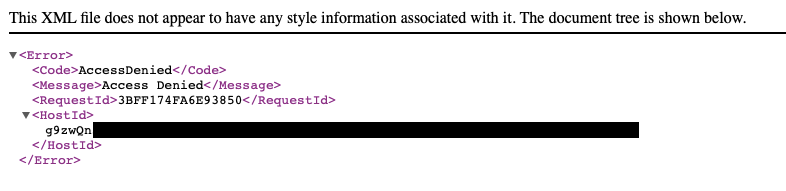
You might see this fault when trying to open up the URL on the browser. This happens considering when uploading the file, its visibility was set to private. Y'all can change the visibility of an existing file using the setVisibility method. You tin can read more about it here. Information technology might as well be a sign the S3 bucket blocks public access to its information.
Closing words
If y'all have any question or comment delight leave them below, or connect with me on Twitter @MarieInnov.
aquinochaketherver.blogspot.com
Source: https://blog.devgenius.io/laravel-api-file-upload-to-aws-a8e87319b82e
0 Response to "No .env File When Uploading to Aws"
Post a Comment